During the heydays of Linux, Neal Stephenson wrote an essay called “In the beginning, there was command line”, about operating systems. The point was not so much about command line; and he eventually said that he does not stand by that essay, after using OS/X. Still, after many years of using Unix, I resonate with that essay. Even if I use Mac OS/X, I find myself using command line often, for all my needs.
These days command line is becoming fashionable again. Thanks to cloud, and thanks to cloud running mostly on Linux, we have a need for command line tools. Most of the automation and orchestration does not need user interface. If any, they are doing away with user interfaces. Even when they need user interface, it is easy to throw one together with REST APIs and http.
First, a little bit of motivation for those that grew up using Windows. Yes, windows make it easy to use a system, with help and hints along with invocation of a system. However, as you are pulling together different systems, filling in the gaps between systems, you find command line will help you become more productive. You are not limited by the tools vendors offer you; you are only limited by your imagination and ability.
Particularly if you are working in cloud, you find yourself using command line often. You are logged into a remote machine – and you need to download or install new app. You need to edit files, transmit files, and change parameters. You need to do all this, possibly from even your cell phone. It can get very frustrating to look for applications to suit your workflows. And, the network settings may not even help you to run arbitrary programs – often they allow only ssh.
If you are going to develop or test applications on the cloud, you have to learn how to use command line effectively. This article is a distillation of the tools that I found useful in working on remote machines. As usual, the following caveats apply: This is not meant as a guide, but a curated list of tools that I found useful. I observed myself at work for a few days, and noted down all the tools I used – naturally, your criteria might vary. I will only explain what the tool is and how to use it. I will leave the details to a link. Hopefully it is useful for you to become productive.
Logging in: Client
Most Linux systems on the cloud allow logging in only via ssh. If you are in OSX or Linux machine, you will not need to look for a client. On OSX, I would recommend you use iTerm2 instead of usual terminal application. On windows, you have two choices: puTTy and MobaXTerm (home edition). You can use other systems such as cygwin, but they are too heavy for our needs. All we need is a window into the remote machine.
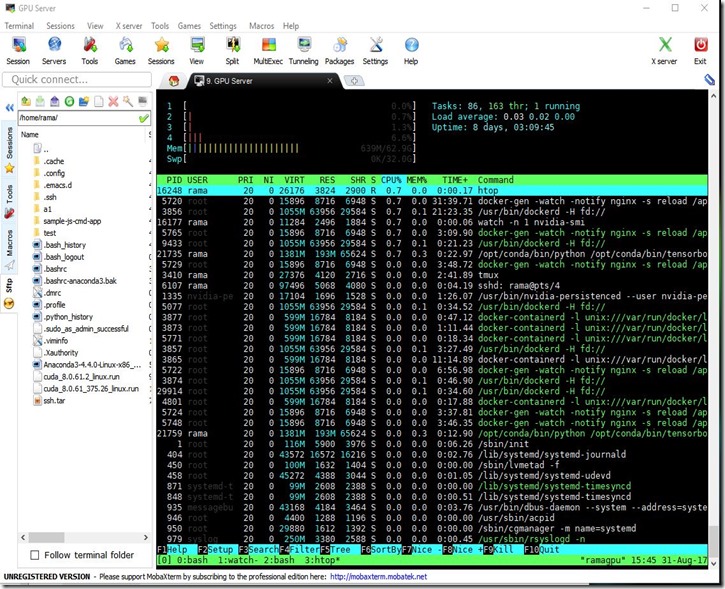
I prefer MobaXTerm for the following reasons:
- Integrated sftp : Copying files back and forth from your desktop and the server is easy.
- Credential management : It remembers passwords, if you allow it, for easy login. A better method is to use your PKI infrastructure.
- Support for X : If you like, you can even tunnel Xwindow programs. Not that I recommend, because you should be able to live with just command line for your needs.
- Additional tools: Even if you are using it as a local terminal, it has enough goodies, almost like light weight cygwin.
Here is the way I work: I start mobaxterm. I do ssh into the box of my choice. If I need to cut and paste a small amount of text, I would use the windows cut-n-paste mechanism. If I need to send large amount of text or data, or even downloadable files, I would use the built-in sftp mechanism to send the files back and forth.
Logging in: ssh
While mobaxterm can remember the password and enter on your behalf, it is not enough for you. Ssh became a de facto mechanism for lot of communications. For instance, if you are using git, you use ssh to login. If you are using scp, it uses ssh underneath. If you want to automate such commands, you cannot expose the password to the scripts. Instead, you would use password-less ssh, with public key/private key infrastructure. Also, you may have to login to multiple servers from your cloud gateway machine where you logged into.
All you need to do is:
- Generate ssh keys using ssh-keygen. You can do it anywhere and transfer the files. I usually work on many machines. I have my own generated public and private keys that I take it from machine to machine.
- Copy the id_rsa.pub to the remote machine into the authorized_keys in .ssh folder.
- When you login first time, you need to accept the machine id. After that, you can login without the password.
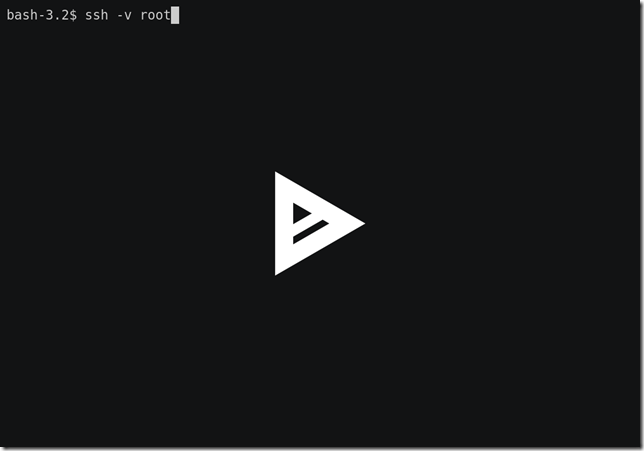
Debug hints: Try ssh –v or ssh –vvv to get an understanding of what is going on. If you are running into troubles, most likely it is because of the permissions issues. Make sure id_rsa file is readable only by you. And, id_rsa.pub is readable by others.
Additional hint: If you are inactive, the server logs you out after a period of time. If you like, you can configure your ssh to send a packet periodically to keep the connection alive. For that add the following lines in .ssh/config:
Host * ServerAliveInterval 30
Interactivity: Tmux
There are several challenges in working remotely on ssh using a window. What if you want to temporarily run a command as a root? You need to open another window. What if you want to go home and work on the remote machine? Your connection will be lost and you need to re-login again from home. And, all your context is lost.
Tmux (and an older alternative, screen) helps you with these kind of problems. There are nice user manuals, guides, cheat sheets for you to learn from. I will tell you how I use it:
- As soon as I login, I start a tmux session. If I already had one, I will attach to that session.
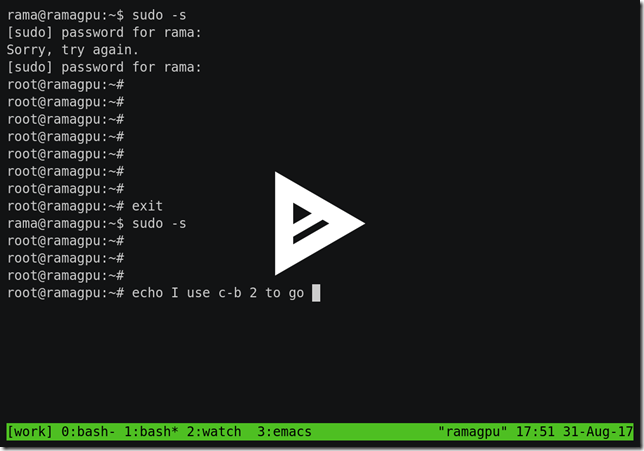
- In a session, I have at least four login sessions running. 1. One is for working with command line as a user. 2. Two is running as root – useful for installation or killing the processes. 3. Three is to watch for essential processes 4. Four is my editor to edit the files locally.
- I use C-b 0/1/2/3 to go to the window of my choice to work on it and come back.
- When I am done, I detach from the session.
- When I use a different machine, I just attach to this session.
- Sometimes, I run it from a shared account – and then, two of us can login to the same session and see debug any code we run.
Just a shout out for watch: Suppose you are planning on running a command in a loop and watch its output. Watch runs it in a terminal and repaints only the changed characters. That clearly shows what part of output changed and what did not. For instance, you can run “watch –n 1 ls –l” runs the command “ls –l” every second. You will see clearly if there is a new file that appeared. It is more useful for checking the status, or the load of the system. Very useful for checking the load on my GPU machine, using “watch –n 1 nvidia-smi”.
Downloading: wget, curl, elinks
The first thing you will need often is to install a package. These two programs help download the any software or application that you want. Out of these, I prefer wget.
Lot of times, you may have to login or accept a EULA before downloading the software. In that case, you have two choices: Download the software onto your machine and use scp to copy the file. Of course, if your network may not be good enough to download. Or, use text based browser like elinks to download the software. Of course, modern JS based websites do not work well with elinks. In that case, if you used MobaXTerm, you may be able to run X-windows application such as firefox and have it pop up on your terminal.
Rsync: Swiss army knife for moving files between machine
Let me give the scenario. Suppose you are editing files on your local machine. You want to move them to a remote machine. How? You can use scp or sftp. Suppose you changed a few of the files in a folder. How do you move them? It is complicated to remember the path and move to the right path. Or, if you changed one line in a large file, you still have to copy large file.
The answer to this and many other questions is rsync. It can work over ssh, which means, if you can login, you can move the files. It moves only diffs, which means you get to move only the differences.
I have a system to publish a website. I edit the files locally. I wrote shell scripts that rsyncs to remote location and that shows up in the website. For instance consider the following one liner:
rsync -avz -e ssh --delete ./local/ root@machine.com:$remote
It uses ssh (-e option), –z (compression), –v (verbose), and –a (archive mode). The “-a” does the trick. It syncs 1) recursively, 2) copies symlinks, 3) preserves owner, 4) preserve modification times, and 5) preserves permissions. What it means is when it copies the folders, it does the right thing. The –delete option removes extraneous files from remote location. That is, if you delete a file local directory, it will remove it from remote too. Without it, it only updates the files. The trailing slack in the local folder means, copy only the contents. Without the trailing slash, it will copy the folder, including the contents. While it looks magical, it only touches the files that modified, and only transmits the deltas, and also compresses.
Example use case: What if we want to update the remote folder every time I write to a local folder?
What we need is to monitor a file or folder for change. There are several ways we can do it.
- You can use inotify tools for any change monitoring. The link provided gives you an idea on how to use it for continuous backups.
- My favorite is to use node.js – there is a module called chokidar that does what we need and more. You can invoke any process on any change.
- Python has a module called watchdog, which does something similar.
All we need to do is to use any of these programs and keep in a loop for changes. When change occurs, do the remote push and then go back to the loop. The rest is left as an exercise.
Find: Swiss army knife to work on many files
For the life of me, I can never remember the syntax for find. Still, I find myself using this utility all the time. It is useful tool while dealing with lot of files at one go. Let me illustrate with some examples:
# To print all the files find .
# To print all the files with .js extension find . | grep .js$
# To print only the directory files find . -type d
# To print only the non-directory files find . -type f
# To print all the files with a specific string, say "TODO:" find . -type f | xargs grep "TODO"
# Notice that xargs repeats the function on all the arguments.
# To print all the files that changed in the last 2 days find . -mtime 2
# You can combine all the capabilities in many ways # For example, all the java files touched in the last week, # with a case insensitive TODO find . -type f -mtime 7 | xargs grep -i TODO
Admittedly, there are better ways to use ‘find’, but I do not want to remember its idiosyncratic options – these ones are the most useful, and most common in my experience.
In addition to the find, there are other unix utils that I find myself using a lot. If you know these, you can use the command line effectively, only reaching for higher scripting languages when really needed. Simple bash, with these utilities can do all that you want and more. Moreover, all these are available in any standard Linux installation. For instance, using cut, paste, join, you can selectively choose and merge parts of the file. You can sort files based on numbers. You can slide and dice files with it.
Running a website: Python, live-server
You have a static website that you want to show to a colleague. Or, you have a set of files that you want to serve up for an application or for colleagues. You don’t have to go all the way, installing and configuring Apache. Instead, the following one-liner can do it:
# python2
python -m SimpleHTTPServer
# python3
python3 -m http.server
# Standard port is 8000. # You can change it by specifying the port as an argument.
If you do not have Python installed, you could try node.js based http servers. The two servers that I like are: http-server and live-server. The beauty of live-server is that the browser auto loads if the file it is showing changes.
# To install and use http-server # Default port is 8080 npm install -g http-server http-server
# To install and use live-server npm install -g live-server live-server
Live-server is particularly useful when we develop static websites. As we edit it, and push it to the remote site, the browser automatically get updated.
Running a website from behind a firewall
Sometimes, your machine may not be accessible from outside. It may be behind a firewall – you may have had to go through a series of ssh tunnels to get to that machine. Or, your machine may be in the corporate VPN.
Fear not. As long as you can access a public website, you can show your website to the outer world. You have two options: http://localtunnel.me – you need to have nodejs installed on your machine.
# Install localtunnel npm install -g localtunnel
# Start the webserver live-server --port=8000
# Run the command to tunnel through lt --port 8000
# The system will give a URL for you to access it from outside. # Example: https://nuwjsywevx.localtunnel.me/ # Notice that it is publcly resolved URL # And, it comes with https!
You have other options: You can use http://ngrok.com (There is free plan). You can tinker with your ssh to do reverse tunneling. I am going to give the full details here, but if you use “shell in a box”, you can even access this machine from outside the firewall, via secure shell. Naturally, please comply with corporate security guidelines.
Creating and publishing content: markdown tools
For programmers, creating documentation is important. They need to record what they do. They need to write design documentation. They need to write user manuals.
Writing in word or any other WYSIWYG tool is pointless – it does not work well over the command line. Suppose you are on a remote machine – and, you need to refer to installation manual. If it is in .docx format, how are you supposed to read it from the command line?
Of course, you could write your documentation in text file. It is ubiquitous; you can create and read it from many tools. Yet, you will not get any good looking and useful documentation out of it. You cannot print the documentation. You cannot have images. You cannot use hyperlinks. All in all, your experience is only limited to the command line. It cannot be repurposed.
A midway is markdown. It is such a simple format (built on text) that it is easily readable, even if you do not do any conversions. It can easily be created on any tool (like any text editor, though I use atom or Visual studio code. Of course, you can use even notepad.
The rules are simple: See https://github.com/adam-p/markdown-here/wiki/Markdown-Cheatsheet -- you can learn them in 10 minutes. If you use atom or code, you can even see preview as you edit.
Once you author the document in markdown format, you can convert to any format you wish. There are several tools. My choice tool is pandoc. It can convert markdown into many formats, including docx (for word), or text, or html.
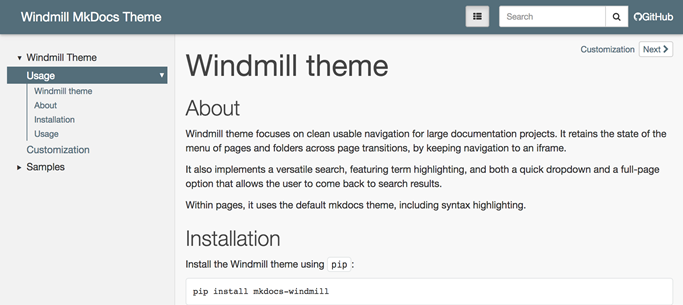
You can do even more with markdown. I use markdown with minimal yaml settings to generate websites – I use mkdocs for its simplicity. If you have a bunch of markdown files, you can generate a static website, with themes and searching capability, using mkdocs and host it, using the technics we discussed earlier. It is always handy for a developer to create a simple website on that favorite library or design that they are working on.
Working together: Expect, tmux
Suppose you are a remote machine – and you are experiencing some trouble – some command line application is not working. You want to show it to an experienced colleague. Or, you just want to train a junior colleague. Here are the two ways:
- Suppose you are sharing the account (it is common with testers etc to create a common account and use it). In that case, you start a tmux session like we described earlier. Let the other colleague also login to the same session. Now you can easily see what the other is seeing. Of course, you want to keep the terminal size the same. Otherwise, it will look weird.
- If you have a different account, you still can share your session with others. What you use is a program called “kibitz”, which is a part of “expect” system. Assume you want help from user "abc". Both of you should be logged in at the same time. All you need to do is kibitz abc and then abc needs to type the command that shows up on their terminal. From then on, they can see and type on your terminal along with you.
Epilogue
I hope you will find these commands useful. Using this knowledge, you can edit files locally, push them to remote machine, and share them on the web with a client. You can start working at the office and continue to work at home on the same setup. You can keep machines in sync. You can create developer friendly websites and share it with colleagues from behind the firewalls.
Finally, there is saying: In windows, you are limited by the tools you have; in Unix, you are limited by the knowledge you have. All the tools are there for you to pick and use, combining in many different ways. The more time you spend, the more proficient you become. Go forth and learn!